Sunday, July 15, 2018

[SCOM] How to Override Existing Rules


From the existing post on [SCOM] Create Monitor Based on Event Viewer Log, we can see this request  to monitor few custom applications wherein they wanted to monitor Event IDs. As per configuration on [SCOM] Create Monitor Based on Event Viewer Log, SCOM will monitor all the servers. So in this post, I will show how to override the rules and monitor just one particular server. Below shows the steps;

Step 1: Open SCOM Management Console and go to Authoring tab

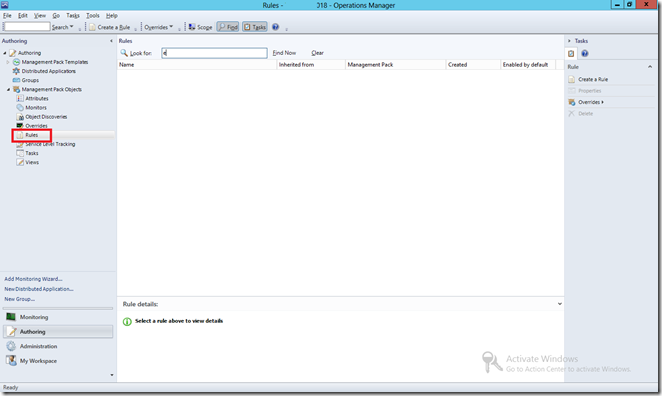
Step 2: On Authoring, go to Rules and search rules name. E.g. Event Viewer Monitoring

clip_image001

Step 3: Right click on Event Viewer Monitoring rules, and choose Overriders > Override the Rule > For a specific object of class: Windows Computer

clip_image001[5]
Step 4: Choose the object you want to override and click OK. E.g. ICG-AP-SQL01.INFRONTAPAC.local

clip_image001[7]
Step 5: On Override Properties, click on Override as below;

clip_image001[9]
clip_image001[11]
Step 6: Click Apply and OK.

Configuration for Override Rules completed. If you have any issue on this, please email to me. I will help you as soon as possible. Thanks!
Saturday, July 14, 2018

[POWERSHELL] How to Simulate Error on Event Viewer Logs


Hye all, today I will share with you guys how to simulate error on Event Logs. If you works in an Enterprise level, you most likely have some type of central monitoring system that collect errors from your event logs such as System Center Operation Manager.

To begin this, let’s open Windows PowerShell console and see what cmdlets are available that deal with the event logs;

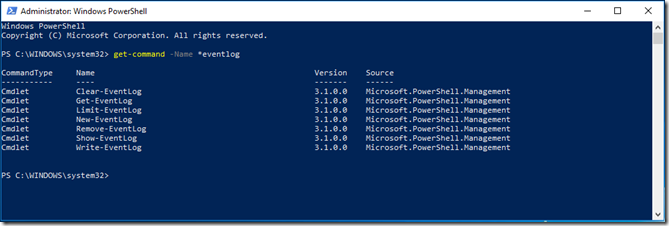
Step 1:  Open the Windows PowerShell console and type “get-command –Name *eventlog”. This command will search all the command contain work “eventlog”. To simulate the error, we need to use Write-EventLog command.

Command: get-command –Name *eventlog

image

Step 2: To simulate the Error EventLog, please follow below command;

Command: Write-Eventlog –LogName Application –Source “Firdaus” –EntryType Error –EventID 8888 Message “for testing only”

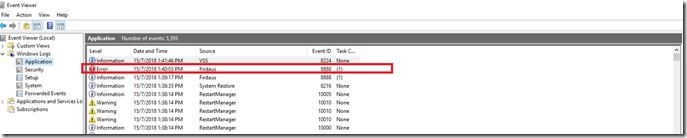
As you can see, the Write-EventLog now return with no error. And if we check the event log entries, we should now see out test message.
image

Step 3: Open Event Viewer and verify the Error EventLog

image

Event Properties details of the message:

image

As you can see, the source is now populated with “Firdaus”. You can also use this to create an event log specifically for your script or to create a source for event logs other than the Application log.

[SCOM] Override Storage Threshold Monitoring for AS/400 ASP Monitor


It is always important to understand how AS/400 server workload are doing. Getting visibility into our systems allows us to proactively deal with future issues. As an example, monitoring can let us know that we are running out of disk space on one of our volumes so we can prepare all the necessary things before it happens.

One of our customer received an alert as below from their SCOM monitoring system.

Alert: AS/400 ASP Monitor
Resolution Status: New
Alert Descriptions: ASP number 1 on ASCMYPRD is 61 % used.
Source: ASCMYPRD.1.66
Path: PWMXXXXXXXX.XXBank.my;PWMXXXXXXXX.XXBank.my;XXXXPRD
Last modified by: System
Last modified time: 6/26/2018 10:11:22 AM

From this alert, we can see that disk utilization for AS/400 environment hits 61% whereby the minimum of the disk utilization set for this server only 60%. Customer request to increase disk utilization as the business are keep growth. Below are the steps how to override the value for AS/400 ASP Monitor.

Step 1: Open SCOM Management Console and click on Authoring tab.

Step 2: Click on Monitors and search monitor called AS/400 ASP Disk Utilization Monitor

clip_image001

Step 3: Open AS/400 ASP Disk Utilization Monitor properties

clip_image001[5]

Step 4: Click on Overrides tab and click View Summary button and choose “For all object of class: AS/400 ASP Disk Utilization”
clip_image001[7]
clip_image001[9]

Step 5: On Override Summary, choose the Effective Value = 60 and click Edit. We need to change this value to 68.

clip_image001[11]

Step 6:  Change the override value from 60 to 68 and click Apply. Then click OK

clip_image001[15]
clip_image001[17]

Step 7: Verify the Effective Value in the Overrides Summary

clip_image001[19]

Overriding configuration for AS/400 ASP Disk Utilization monitor completed. Verify the Alert on the SCOM management console.


Sunday, May 06, 2018

[AZURE] Redeploy Virtual Machine on Azure

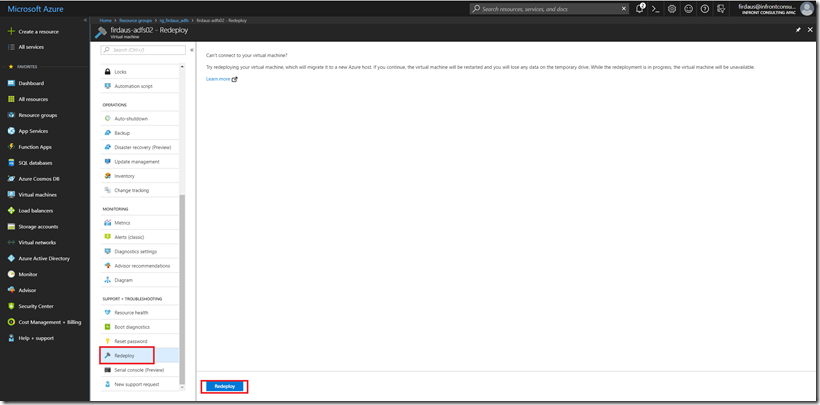
Hey guys! For today I just want to share issue that I have been facing during troubleshooting Remote Desktop (RDP) connection or application access to my Virtual Machine (VM). After few times try to connect VM using RDP still unsuccessful then I think redeploying the VM may helps. Steps as below;

Step 1: Open Azure portal


1. Open your Azure portal and select the VM you wish to redeploy, then select the Redeploy button in the Settings blade.

image

2. The Status then changes to Starting as the VM boots up on a new Azure host

image

3. Once complete the boot process, the Status then return to Running indicated the VM has been successful redeployed

image


Monday, April 30, 2018

[SCOM] Create Monitor Based on Event Viewer Log

Recently we got a request from our customer to monitor few custom applications wherein they wanted to monitor Event IDs as well. Earlier they wanted to monitoring to be done only focus on the Event ID only, however when they see the report, they also need to be monitor the Event Source and Event ID. So, below are the steps involved in enabling Windows Event ID monitoring thru SCOM:

Let’s start..

What’s required?

Below information gather from our customer that we can used to monitor:
1. Source ID
2. Event ID


Step 1: Create Monitor Rules

1. Login SCOM console and click on Authoring

2. Expand Management Pack Objects and click on Rules

3. Right-Click on Rules and click Create Rules

image

4. Select Event Based > NT Event Log (Alert) rules and destination of Management Pack, and click Next

clip_image001

5. Insert Rule Name, Description, Rule Category, and Rule Target as below;

Rule Name: Event Viewer Monitoring
Description: Monitor Event Viewer ID: 8888 & Source ID: MSSQLSERVER
Rule Category: Alert
Rule Target: Windows Computer
Then, click Next

Note: If you tick Rule is enabled, this rule will discovery all the Windows Computer

image

6. Click Next

image

7. Insert Event ID and Event Source and click Next

image

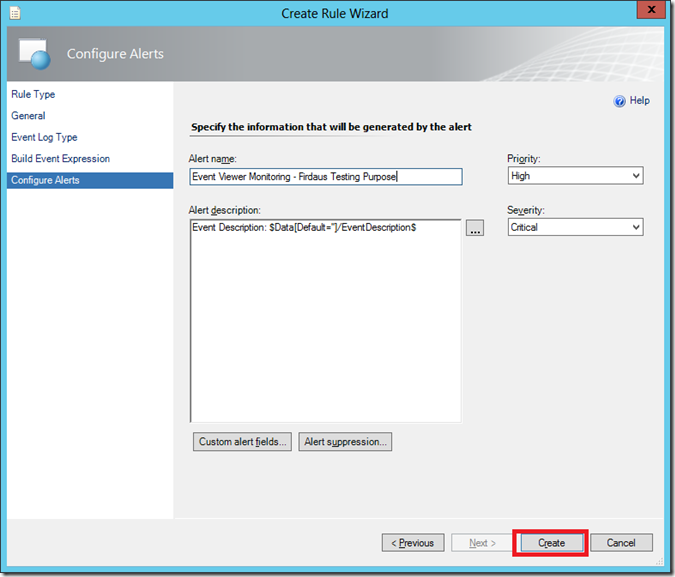
8. On the Configure Alert page, set the priority to High and severity to Critical and click  Create

image

9. Taadaaaa. You already create the Monitor Rules. Next step is to override the monitor rule. If you want to point directly to certain servers, yes you are required to override this rules else just leave it.

image

Configuration completed. If your event viewer logged the log from Event ID:8888 or Source ID: MSSQLSERVER, you will viewer the alert sending to SCOM.

You might want to view;

[SCOM] – Override Rules
[POWERSHELL] – Simulate an Event Viewer Error Log

[AZURE] Quick Start – Create a Resource Group in the Azure Portal

Azure Resource groups provide a way to monitor resources such as virtual network, virtual machine, network security groups, subscriptions and others. You can deploy, update, or delete all the resources for your solution in a single coordinate operation. To create an Azure resource group, perform the following steps:

Step 1: Login to Azure Portal
1. Login to the Azure portal at https://portal.azure.com

image

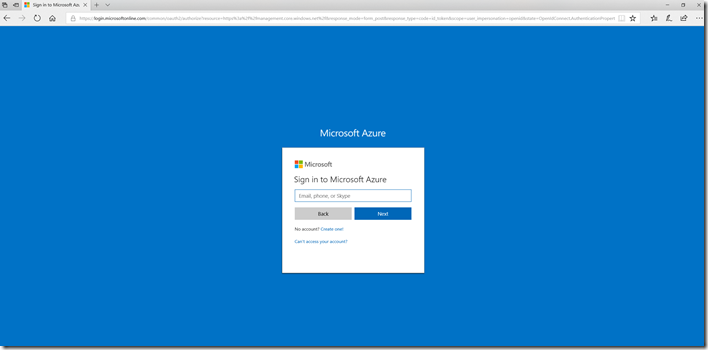
2. On the Microsoft Azure Portal page, insert your Email Address and click Next

image

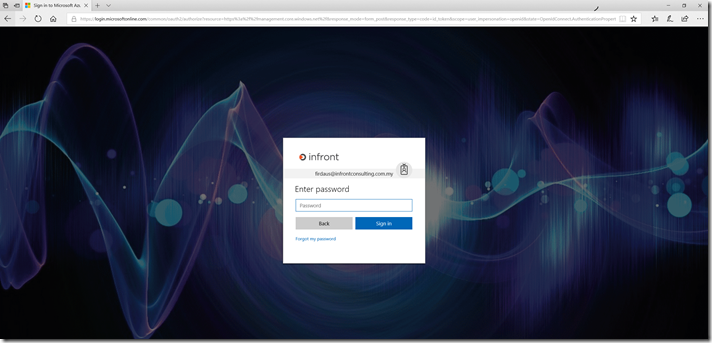
3. Insert password and click Sign in

image

4. This is view for Microsoft Azure Portal. In this Portal, you are able to manage all your Azure Services under your subscriptions.


Step 2: Create Resource Group

1. On the left pane of the dashboard, click Resource Groups
2. In the Resource groups pane, click Add

image

3. Insert your Resource Group Name, Subscriptions and Resource Group Location.

Note:
Resource Group Name: rg_firdaus_adfs 
Subscriptions: Pay-As-You-Go

4. Click Create


image

Complete configurations. You may configure VMs inside this Resource Groups.


[AZURE] Quick Start–Create a Windows virtual machine in the Azure Portal

Azure virtual machines (VMs) can be created through the Azure portal. This method provides a web-based user interface to create VMs and their  resources including virtual network, and storage account. This quick start shows you how to use the Azure portal to deploy a virtual machine (VM) in Azure that runs Windows Server 2016. To see your VM in action, you then RDP to the VM.


Step 1: Login to Azure Portal

1. Login to the Azure portal at https://portal.azure.com

image

2. On the Microsoft Azure Portal page, insert your Email Address and click Next

image

3. Insert password and click Sign in

image

4. This is view for Microsoft Azure Portal. In this Portal, you are able to manage all your Azure Services under your subscriptions.

Step 2: Create Virtual Machine

1. On the left pane of the dashboard, click Virtual Machines

2. In the Virtual machine pane, click Add

3. Search and select Windows Server 2016 Datacenter in the Compute pane, then choose Create

image
image

4. Provide a VM name, such as firdaus-dc01, leave the disk type as HDD, then provide a username, such as firdaus.adm. The password must be at least 12 characters long and meet the defined complexity requirements.

image

5. Choose to Create new/ Use existing resource group, then provide a name, such as rg_firdaus_adfs. Choose your desired Location, then select OK

Note: If you already create resource group, then choose Use existing resource group else Create new resource group. Later I will show you how to Create new resource group in Quick Start – Create a Resource Group in the Azure Portal

image

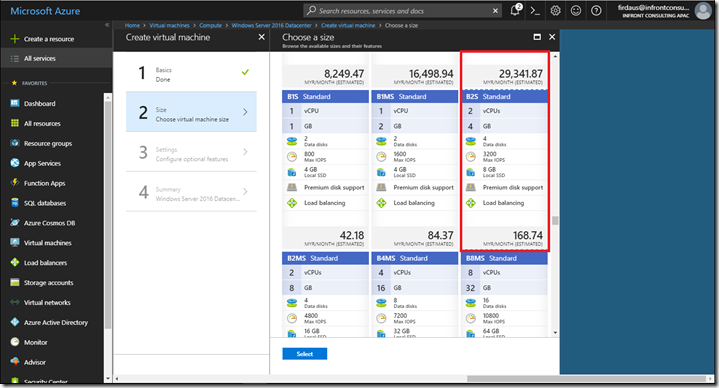
6. Select a size for the VM, You can filter by Compute type or Disk type, for example. Mine using VM size is B2S Standard, then click Select

clip_image001[8]
image

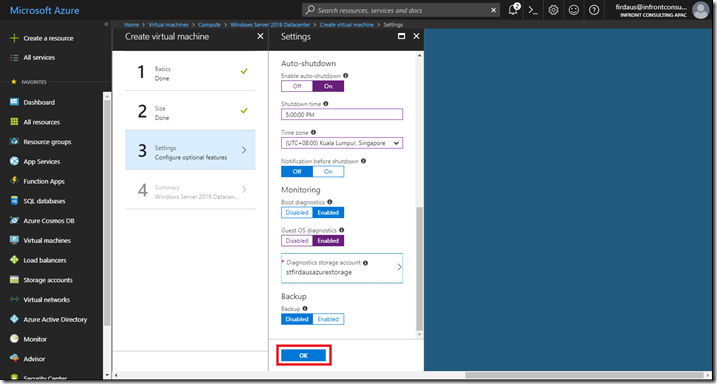
7. Under Settings, leave the defaults and select OK

Note:If you are new user, this configuration just leave the defaults else you can configure Virtual Network, Subnet, Public IP Address, Network Security Group (Firewall),Monitoring and etc

image

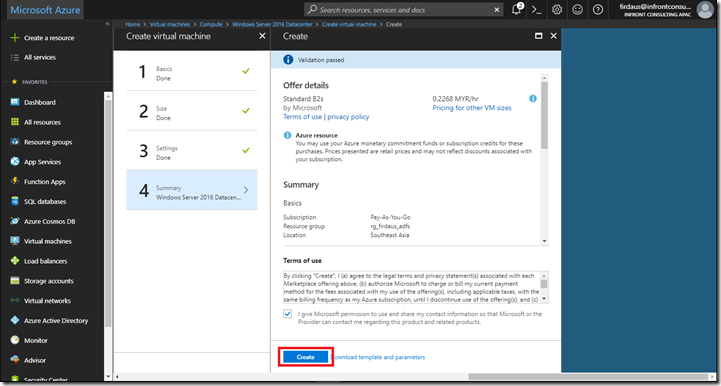
8. Verify the configuration on the summary page, select Create to start the VM deployment

9. The VM is pinned to the Azure Portal dashboard. Once the deployment has completed, the VM summary automatically opens

Step 3: Connect to Virtual Machine

1. Navigate to the left pane by clicking to the Resource Groups > rg_firdaus_adfs

image

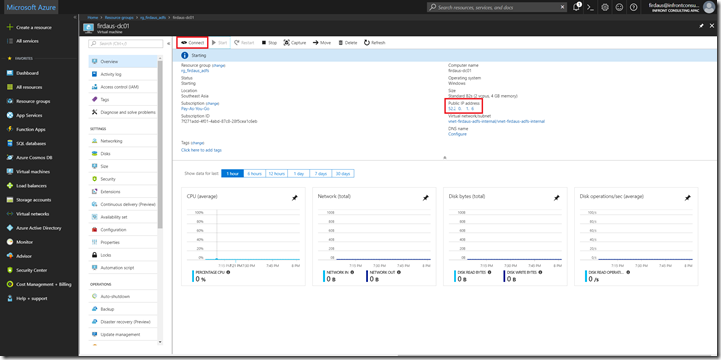
2. Choose your VM. E.g. firdaus-dc01

image

3. Click the Connect button on the virtual machine properties. A Remote Desktop Protocol file (.rdp file) is created and downloaded.

4. To connect to you VM, Open the downloaded RDP file, If prompted, click Connect.

5. Enter the username and password you specified when creating the virtual machine , then click OK

6. You may receive a certificate warning during the sign-in process. Click Yes or Continue to proceed with the connection

You also able to RDP using Azure VM Public IP